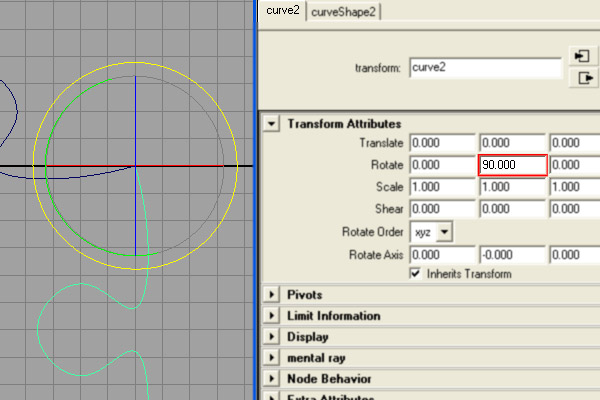
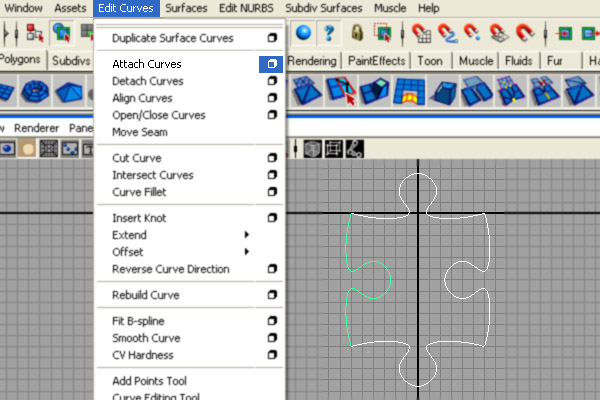
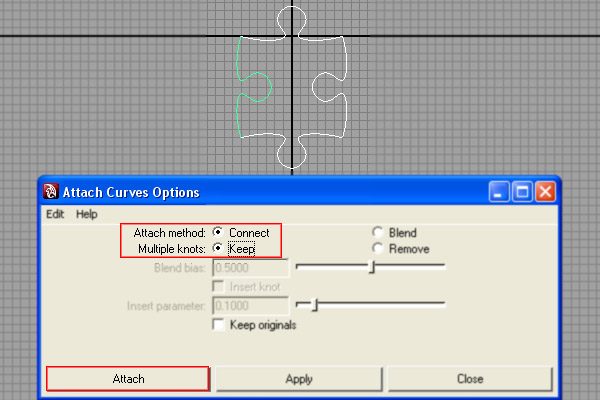
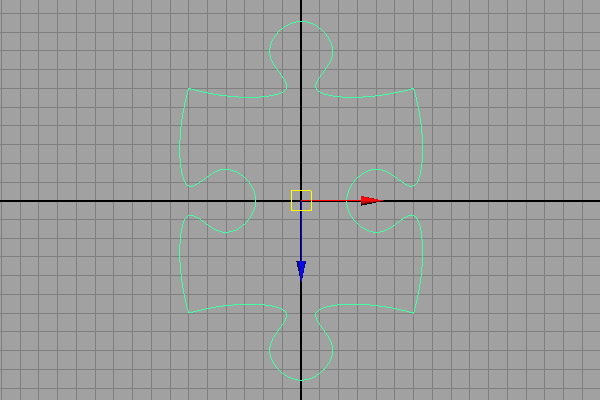
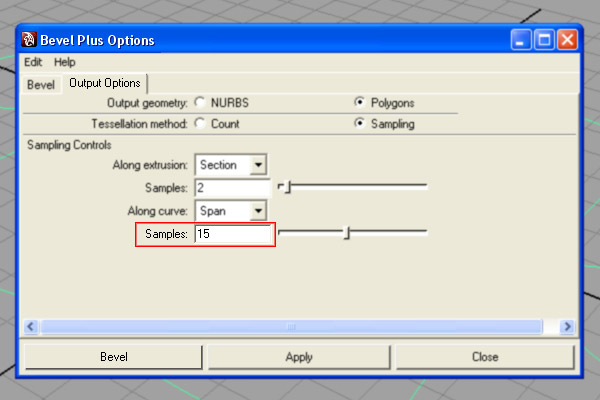
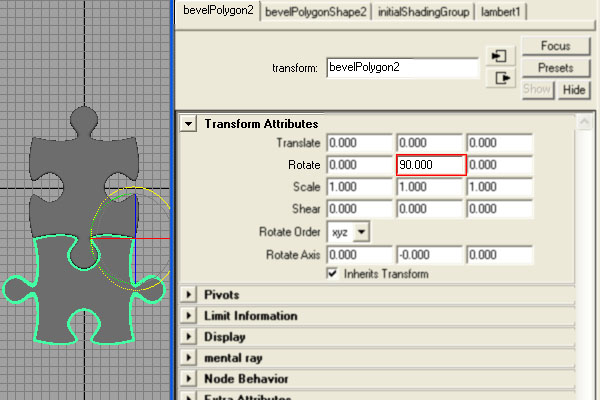
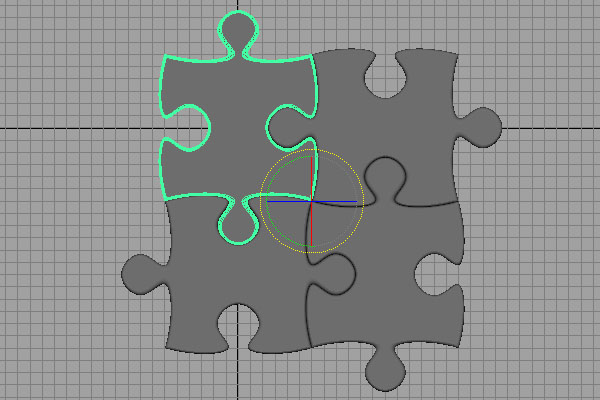
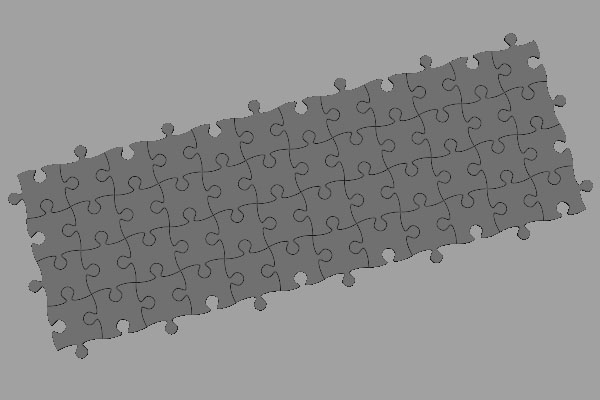
hurtigt tip: at skabe en enkel 3d gåde på maya,,,,,,, i denne hurtige tips, forfatter abed ibrahim vil vise jer en god måde at skabe en enkel 3d puslespil med maya.selv om en enkel fremgangsmåde, denne værdifulde teknik kan anvendes til en række forskellige projekter, lige fra simpel krydsord meget komplekse scener, eller endog animeringer.,,, supplerende dokumenter /plugins:,,, downloade cgtuts + logo, trin 1, åbne maya og skabe en ny scene, så skift kamera til " top view " og zoom ind.,,, trin 2, skift til (overflader menu) ved presning " f ", så gå til at skabe > ep 's curve værktøj,.,,, trin 3, trækker 7 point, mens presserende og bedrift " x " på tastaturet, kom de punkter, de gør.så tryk " træde ".,,, trin 4, nu presse " 3 " for at lette kurve.så " lige " klik og vælge " kontrol vertex ".prøv at nøje svarer til følgende form.,,, løntrin 5, presse ", indsæt " og flytte " - " for det første punkt på nettet, ved at presse på og holde " x ".,,, trin 6, så tryk ctrl + " d " at kopiere den kurve, form, og drej den, 90 grader på " y ", akse.,,, trin 7, gentag processen for de næste to kurver til fuldstændige form.så, redigere kurver > og den mulighed, rubrik for " tillægger kurver ".,,, trin 8, tilpasse de indstillinger til følgende.and then press "Attach":,- Attach method: ,Connect,,- Multiple Knots: ,Keep,,- Attach, \t, ,Step 9,Delete History and center the shape to the center of the grid, and then delete the old curves., \t, ,Step 10,In the "Persp View", go to ,Surfaces >, and open the Option Box for "Bevel Plus"., \t, ,Step 11,Modify the following settings in the "Bevel"(1) and "Output Options"(2) tabs, then press the "Bevel" button., \t,,, ,Step 12,Delete History and hide the Curve, then in the "Top View", snap the pivot to the lower right corner and to the grid point (as shown)., \t, ,Step 13,Press "Ctrl+D " to duplicate the puzzle piece, then rotate it ,90, degrees on "Y" axis., \t, ,Step 14,Now press "Shift+D" twice to duplicate the shape with the transform attributes., \t, ,Step 15,Repeat the last three steps until you get the desired puzzle size., \t, ,Step 16,Select all the puzzle pieces, and switch to the Polygons menu (F3), then go to ,Mesh > Select > Combine,., \t, ,Step 17,Open the "Hypershade" menu from ,Window > Rendering Editors > Hypershade,, and choose your image file (texture.), \t,,, ,Step 18,Select all the faces at once (from the "Side" or "Front" views, and then Assign the image to them., \t, ,Step 19,Choose "Planar Mapping" from "Create UVs" menu, and adjust the UVs through the Attributes and the Manipusenere.,,, gå 20, vi '. færdig!du kan gøre din scene, enten ved hjælp af mental ray eller maya.,,,